 (507) 720-3450
 info@fountainscapesandwaterfalls.com


Quick Answer: What Happens During a Pond Installation?
During a pond installation, the contractor confirms the layout, prepares the site, excavates the pond shape, installs underlayment and liner, places the skimmer and biological filter, connects the plumbing, builds the waterfall, adds rock and gravel, fills the pond, starts the system, adjusts water flow, and explains the basic operation to the homeowner.
The finished pond may look peaceful, but the build process is full of important decisions. Depth, shelves, edge treatment, pump sizing, pipe routing, filtration location, stone placement, and water movement all affect how the pond performs after the crew leaves.
Simple rule: a pond should be built as an ecosystem, not just as a landscape decoration that happens to contain water.
Pond Installation Process Overview
Every yard is different, but most ecosystem pond installations follow a similar sequence. This order matters because the system is layered. Once liner, boulders, gravel, plumbing, and water are in place, it is much harder to fix mistakes hiding underneath.
| Installation Step | What Happens | Why It Matters |
|---|---|---|
| Site review | Access, grade, drainage, utilities, and work area are reviewed. | Prevents avoidable surprises before excavation begins. |
| Layout | Pond shape, waterfall location, filtration, and viewing angles are confirmed. | Aligns the build with the homeowner’s space and design goals. |
| Excavation | The pond is dug with proper depth, shelves, and edges. | Creates the structure for plants, fish, stone, and stable water volume. |
| Underlayment and liner | Protective underlayment and pond liner are installed. | Protects the water-holding system from punctures and soil pressure. |
| Filtration and plumbing | Skimmer, BioFalls or biological filter, pump, pipe, and check valve are installed. | Creates water movement, oxygenation, and filtration. |
| Rock, gravel, and waterfall | Boulders, gravel, waterfall stones, and edge treatments are placed. | Naturalizes the pond and supports the biological ecosystem. |
| Startup and walkthrough | The pond is filled, started, adjusted, and reviewed with the homeowner. | Confirms the system is functioning and the owner understands basic care. |
Step 1: Site Review and Access Planning
Before excavation starts, the work area needs to be reviewed. This includes access into the backyard, existing landscaping, slopes, drainage patterns, utility awareness, soil conditions, and where materials can be staged.
Access is one of the sneakiest timeline goblins. A wide-open yard may allow faster equipment and material movement. A tight side yard, steep slope, fence, patio, mature planting bed, or narrow gate can slow the project down because more work has to be done carefully by hand or with smaller equipment.
- Where can equipment enter the yard?
- Where will soil, rock, gravel, liner, and tools be staged?
- Are there sprinkler lines, utilities, roots, or hidden obstacles?
- How does water naturally move through the yard?
- Will the pond location be visible from patios, windows, and outdoor living areas?
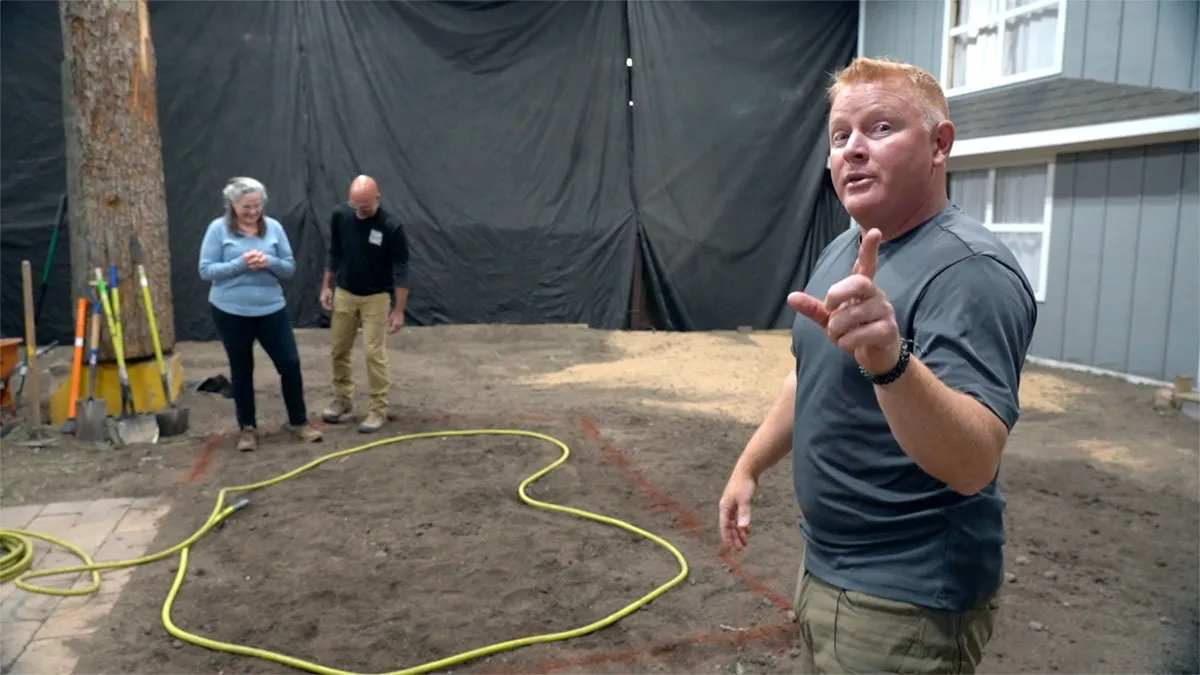
Step 2: Pond Layout and Design Confirmation
The pond outline is marked before digging begins. This is where the general shape, waterfall location, skimmer location, biological filter location, viewing angles, and surrounding landscape relationship are confirmed.
A good layout considers how the pond will look from the places people actually use: patios, decks, windows, seating areas, walkways, and garden paths. A pond should not only look good from above during construction. It should feel right from the places where life happens.
Design detail: the best pond location is usually not just “where there is open space.” It is where sound, movement, views, maintenance access, and natural landscape flow all work together.
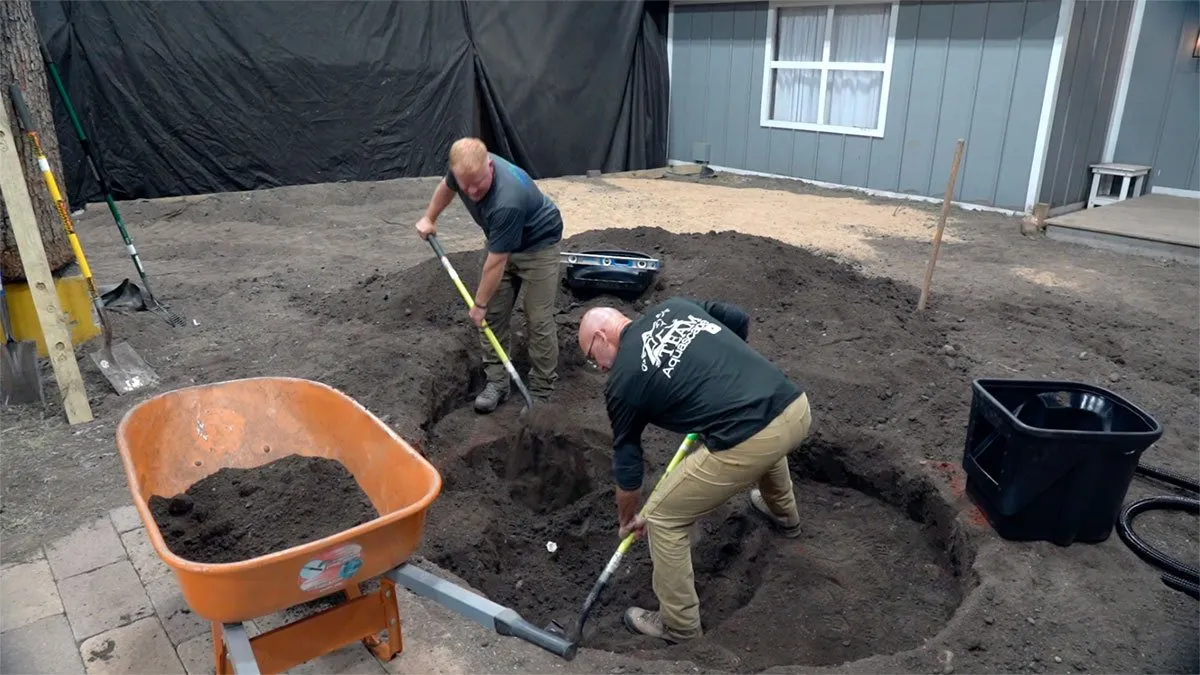
Step 3: Excavation, Shelves, and Pond Shape
Excavation is where the pond begins to become real. The pond is shaped with planned depth, planting shelves, edge areas, filtration zones, and room for stone. This is not random digging. The excavation controls the pond’s structure.
In Minnesota, depth and seasonal planning matter. A pond that may hold fish needs to be designed with winter realities in mind, and the edges need to be built so runoff, mulch, soil, and lawn debris do not constantly wash into the water.
- Depth: supports water volume, fish needs, temperature stability, and winter planning.
- Shelves: create places for aquatic plants, stone, and visual transitions.
- Edges: help keep outside debris and runoff from entering the pond.
- Filtration zones: allow proper placement of skimmer and biological filtration.
Step 4: Underlayment and Liner Installation
Once the pond is shaped, protective underlayment is installed before the liner. Underlayment helps protect the liner from rocks, roots, soil pressure, and other hidden hazards. The liner then creates the water-holding layer of the pond.
This step is quiet but critical. The liner is not the glamorous part of the pond, but it is the part you really do not want to think about later. Proper liner placement, folds, protection, and edge handling help prevent problems that are expensive and unpleasant to correct after the pond is finished.

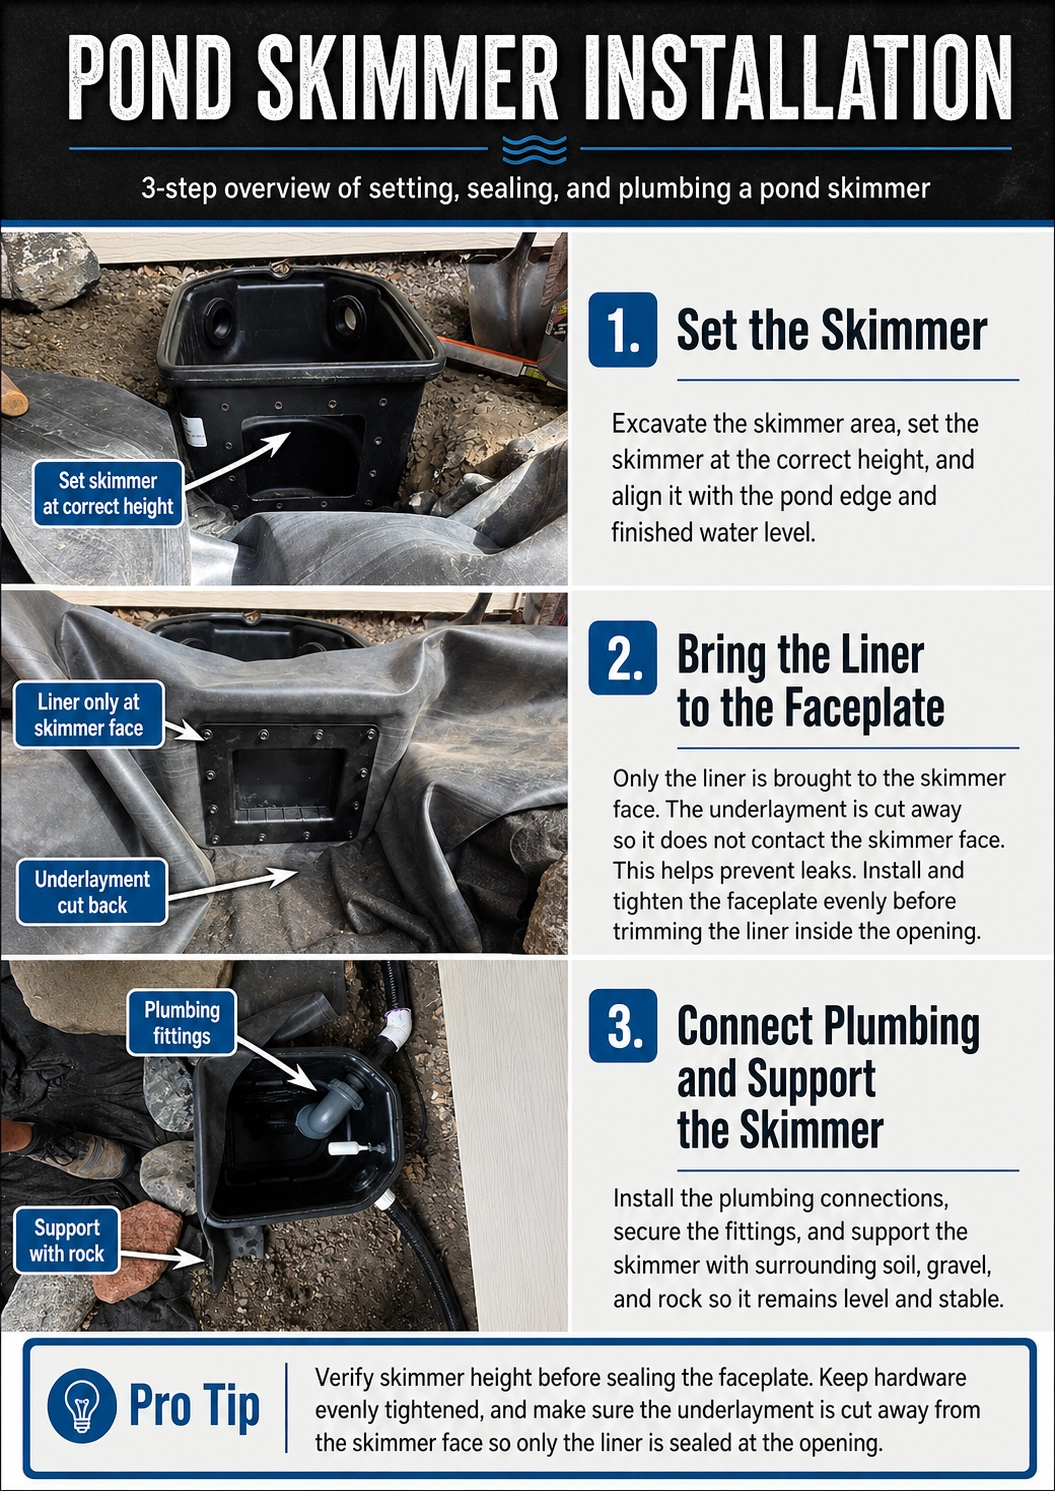
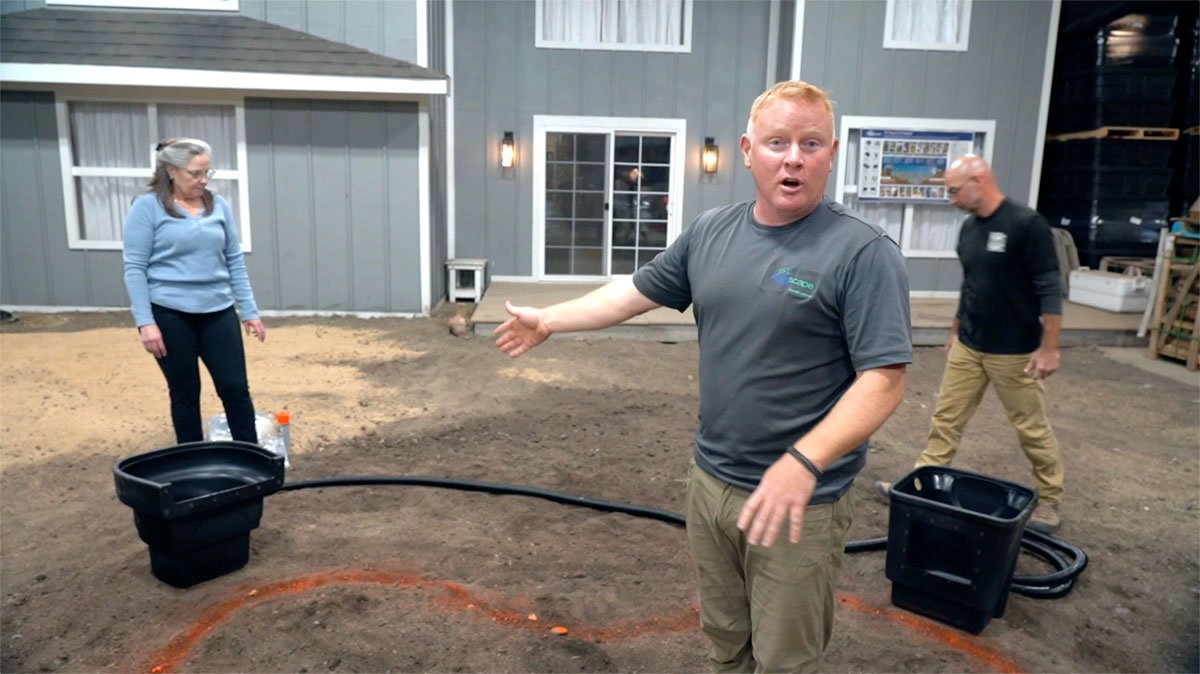
Step 5: Skimmer, BioFalls, Plumbing, and Pump Setup
A properly designed ecosystem pond uses circulation and filtration to keep water moving and support biological balance. The skimmer helps collect floating debris from the pond surface, while biological filtration supports beneficial bacteria that help process nutrients in the system.
Plumbing connects the pump, skimmer, biological filter, and waterfall. Pipe sizing, routing, fittings, check valves, and pump selection all matter. When the plumbing is wrong, the pond may have weak flow, poor circulation, extra maintenance, or a waterfall that performs like it is quietly apologizing.
- Skimmer placement for surface debris collection
- Biological filtration placement for water quality support
- Pump and plumbing connections
- Check valve installation
- Waterfall feed line routing
- Electrical coordination for safe pump operation
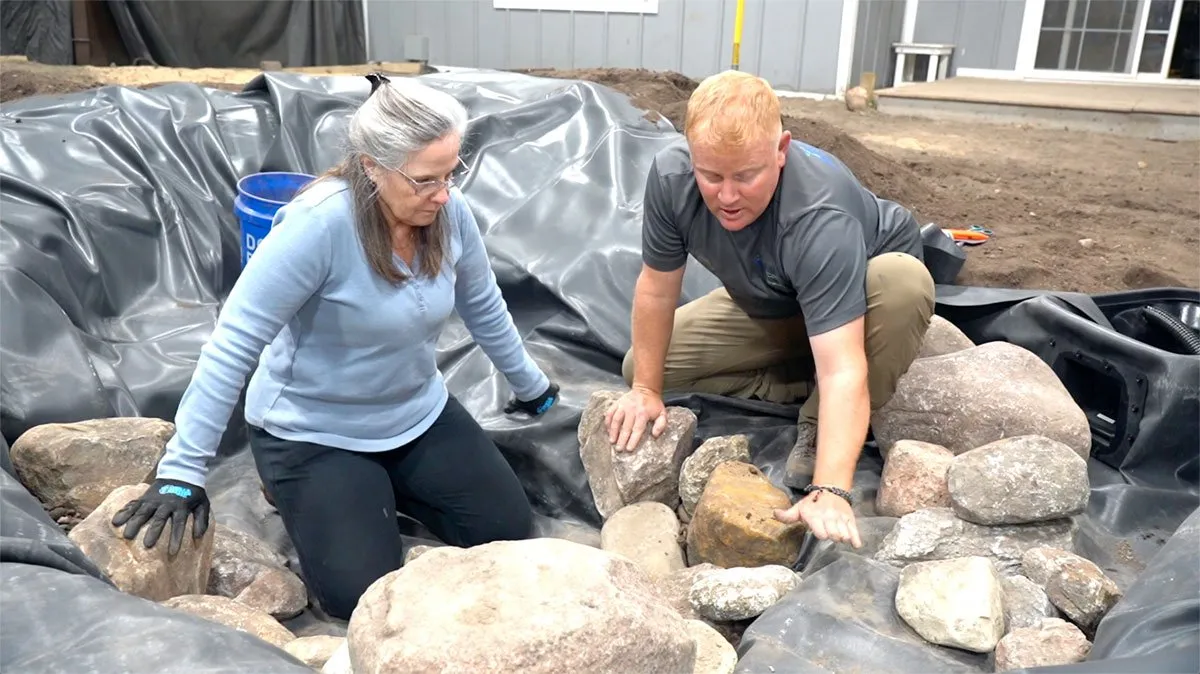
Step 6: Rock, Gravel, and Edge Treatment
Rock and gravel do more than make the pond look natural. They protect the liner, create surface area for beneficial bacteria, stabilize edges, form planting pockets, and help blend the pond into the surrounding landscape.
Boulder placement is part construction and part sculpture. The stones have to look natural, sit securely, shape the water, and hide the construction layers underneath. Rushing this stage is how ponds end up looking like a geology drawer spilled into a backyard.
- Large boulders define structure and edge character.
- Gravel protects liner and supports biological surface area.
- Stone shelves create natural transitions into the water.
- Proper edges help reduce runoff contamination.
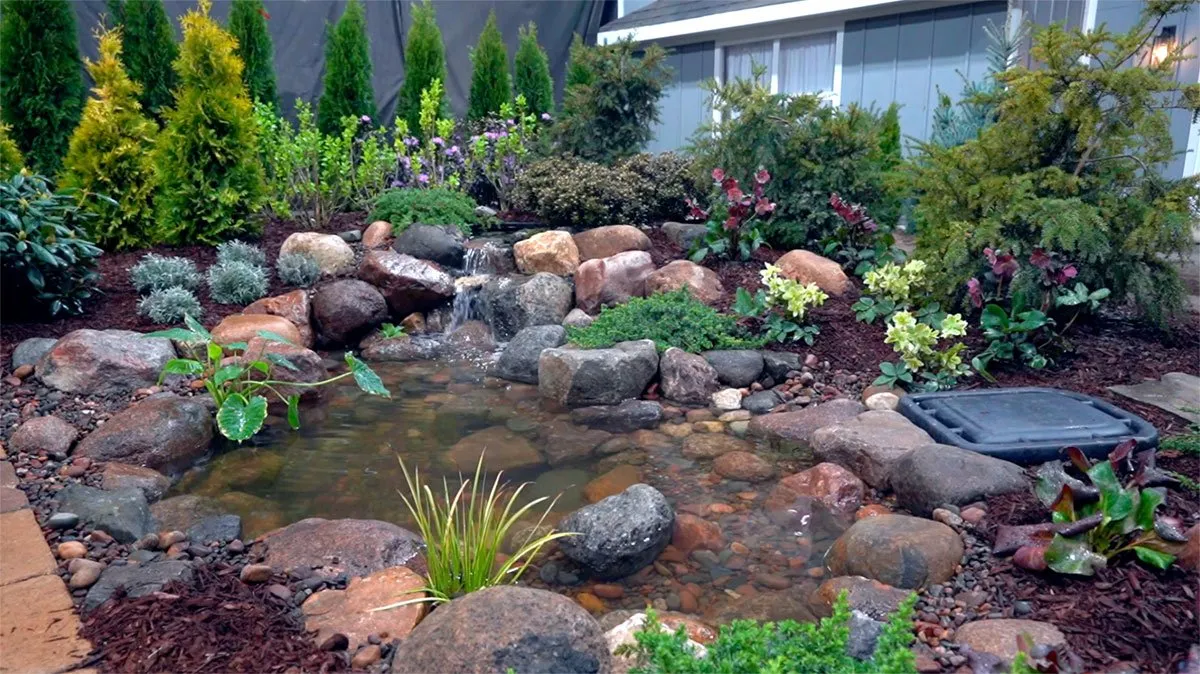
Step 7: Waterfall Construction and Flow Adjustment
The waterfall is often the emotional center of the pond. It creates movement, sound, oxygenation, and visual energy. During construction, stones are placed to shape the water path, create drops, hide liner, and produce the right sound.
A waterfall should not look like water leaking from a rock pile. The goal is a believable flow path with controlled edges, stable stone, and a sound level that fits the space. Some homeowners want a gentle trickle. Others want a stronger waterfall voice. The design and stonework control that personality.

Step 8: Filling, Aquatic Plants, Beneficial Bacteria, and Startup
Once the pond structure, filtration, plumbing, stone, and waterfall are ready, the pond is filled and the system is started. The pump is checked, water flow is adjusted, and the waterfall is fine-tuned.
Aquatic plants and beneficial bacteria help the ecosystem mature. New ponds can go through an early adjustment period as the water, filtration, plants, bacteria, and sunlight begin to find balance. This is normal. A pond is not just installed; it wakes up.
- Fill pond and check water level
- Start pump and confirm circulation
- Adjust waterfall flow
- Add aquatic plants where appropriate
- Introduce beneficial bacteria as part of startup
- Review early water clarity expectations
Step 9: Final Cleanup, Walkthrough, and Owner Education
At the end of the installation, the site is cleaned up, the system is reviewed, and the homeowner should understand the basic operation of the pond. This includes pump operation, water level awareness, skimmer access, basic debris removal, early ecosystem expectations, and seasonal maintenance planning.
A good walkthrough turns the finished pond from a mystery box into something the homeowner can confidently enjoy. The goal is not to bury the owner in technical details. The goal is to explain what matters, what is normal, and when to call for help.
What Homeowners Should Expect During the Build
Pond installation is real construction. There will be tools, soil, rock, liner, equipment, water, and temporary disruption. The yard may look worse before it looks magical. That is normal.
A professional process should still feel organized. The homeowner should know where the work is happening, what access is needed, how long the project is expected to take, and what decisions may come up during the build.
- Temporary disruption around the work area
- Material staging for stone, liner, gravel, pipe, and filtration
- Excavated soil that may need to be removed or reused
- Water flow adjustments near the end of the project
- Final cleanup and edge dressing after major construction is complete
Frequently Asked Questions
What happens first during a pond installation?
A pond installation usually begins with site review, access planning, layout confirmation, utility awareness, and final design review before excavation starts.
How is an ecosystem pond excavated?
An ecosystem pond is excavated with planned depths, shelves, edges, filtration locations, and stone placement in mind. The excavation controls the structure of the pond before liner, rock, and water are added.
When does the pond liner go in?
The liner is installed after excavation and protective underlayment. The underlayment helps protect the liner from soil, rocks, roots, and hidden pressure points.
What filtration is used in an ecosystem pond?
A professional ecosystem pond often uses mechanical filtration, biological filtration, pump circulation, plumbing, rock, gravel, aquatic plants, and beneficial bacteria to support a balanced system.
Why does rock placement take so much time?
Rock placement affects appearance, stability, water movement, liner protection, fish habitat, plant pockets, and edge treatment. Good stonework is one of the biggest differences between a pond that looks natural and one that looks assembled.
What happens after the pond is filled?
After filling, the pump and filtration are started, the waterfall is adjusted, water level is checked, startup treatments may be added, and the homeowner should receive basic operation and maintenance guidance.
Thinking About a Pond Installation?
If you are considering a backyard pond, the next step is understanding your space, your goals, your maintenance comfort, and the kind of water feature that fits your yard. A pond can be simple and peaceful, dramatic and naturalistic, or part of a larger outdoor living plan.
Fountainscapes & Waterfalls designs and builds custom ecosystem ponds, pondless waterfalls, fountainscapes, and water feature lighting for homeowners in New Ulm, Southern Minnesota, and select surrounding areas.